Change Minecraft Skin On Console
Things are a bit more straightforward from a console, but it also limits the number of skins you can have. You can only use and purchase the ones available for Minecraft. When you open up the game, navigate to the Help and Options section, and click the change skin option. There should be a variety of skin packs you can purchase, and after you buy or choose the one you want, you can pick the choice you want for your avatar.
Donât Miss: How To Make A Chisel In Minecraft
Change Skins In Minecraft Java Edition
With the latest edition of Minecraft Java, the skin switcher comes built within the game launcher. So, open the Minecraft launcher, and lets get started.
1. In the Minecraft launcher, first make sure that the Java edition is selected on the left side panel. Then, move to the Skins tab on the top menu.
2. Now, the launcher will show you all the skins you have used in your game, along with the option to add new skin. The largest skin model on the left side will indicate the skin you are currently wearing in the game.
3. Finally, to equip or change into a specific skin, hover the cursor over it. Doing so will show you an option to use and edit it. and your new skin will be equipped in a few seconds.
Things To Keep in Mind When Changing Skins
Unlike the Bedrock edition, the Java edition has some restrictions when it comes to switching or using skins. These include:
- The skins uploaded on your Minecraft profile using their online portal arent saved in the launcher.
- The launcher is dependent on the platform. So, you cant find your saved skins from one Java platform on other Java platforms even if you are using the same account.
- Only currently used skin gets synced across platforms for the same Minecraft account.
- Java edition doesnt support transparent skins. It replaces the transparent blocks in skins with black color.
- You have to relaunch the game each time you change a skin for it to activate.
How To Change Your Minecraft Skins On Mobile Pocket Edition
1. Using your mobile device, simply go to Minecraftskins.com and select from the millions of skins for your character in the game.
2. After deciding on a skin, enter the skin page of your choice, scroll down the page and you will find the Download button just below the skin model. Click on it.
3. A new window will open within your mobile browser and ask if you want to View or Download the image. Select View.
4. Place and hold your finger on the image for 2 to 3 seconds and you should be prompted to Share, Add to Photos or Copy. Select Add to Photos and the skin file will be saved into your Photo album on your device.
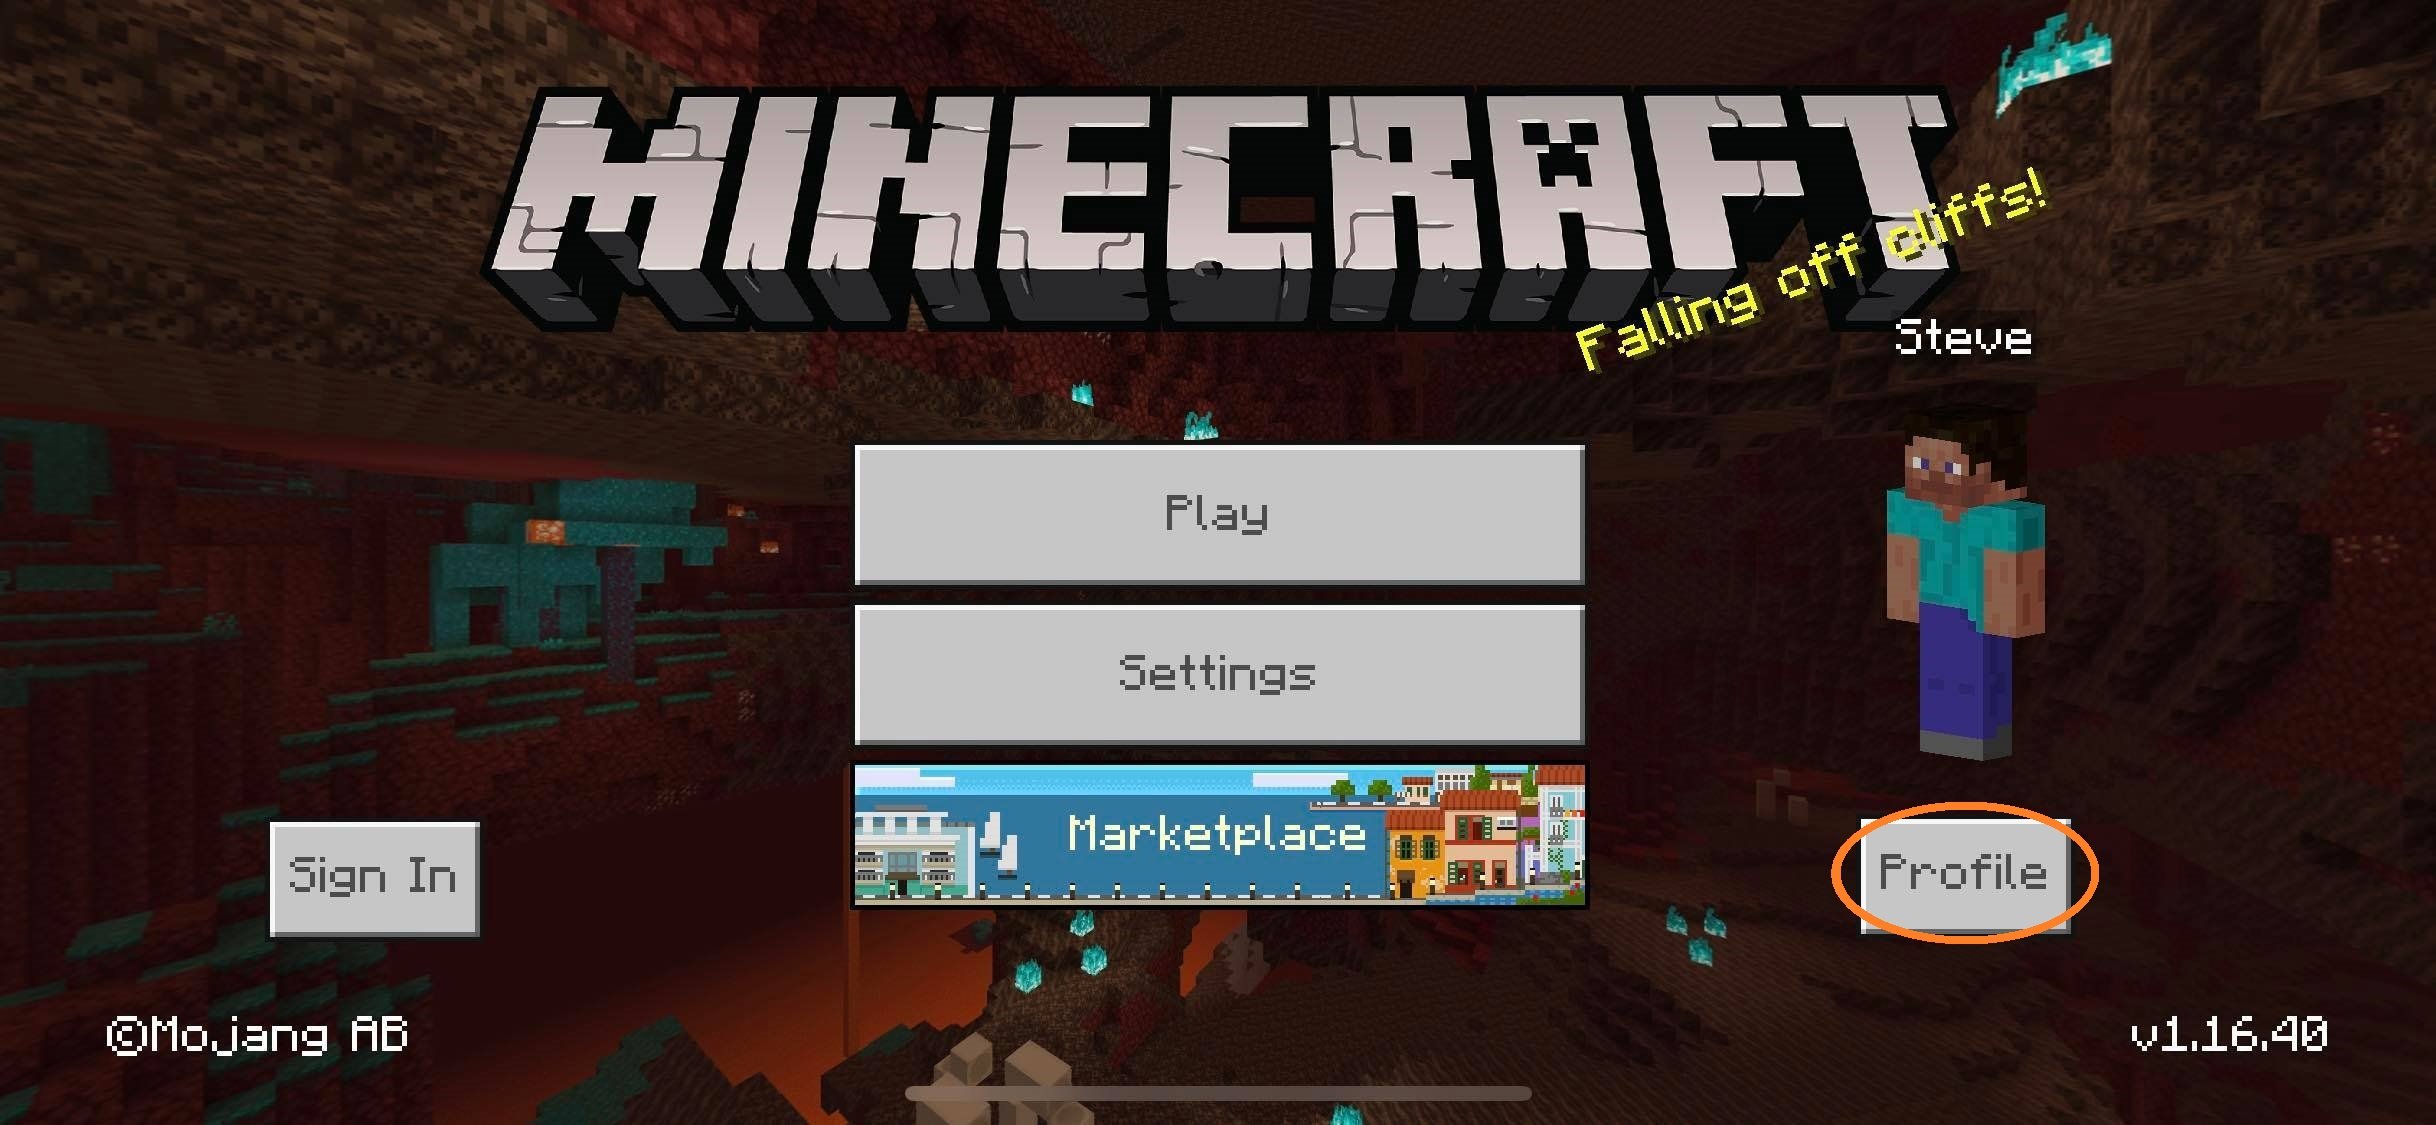
5. Go to the Minecraft App game, click on the Profile button on the lower right.
6. Tap on Edit Character
7. Tap on the 2nd icon to the left. Followed by Owned, Import then Choose New Skin.
8. Your photo album will open up for you to select the skin image you have just saved.
9. You will be prompted to choose between the 3px Slim on the left or the 4px classic on the right. Most skins are 4px classic sized, when in doubt always choose the one on the right.
*You can find out which arm size is the accurate one on the Skin page where you first downloaded the skin. The information is located on the lower left corner of the 3D model previewer.
If you selected the wrong size, dont worry! Just go back to step 5 and upload the skin again with the correct size.
Load up the game and you should be wearing your new skin in the game!
And remember!
Recommended Reading: How Many Different Items Are In Minecraft
How To Install New Skins In Minecraft
Before you can change your skin, you need to get it in the game. We already have a tutorial covering how to get skins in Minecraft. You can use this resource to store a variety of skins on your platform and switch between them at different times. Practically, you can even use the same method to change your Minecraft skin, but it might lead you to reinstall the same skins each time you want to use them. So, to avoid that repetitive process, lets see how to change stored Minecraft skins.
How To Change Your Minecraft Skins On Pc

1. Make sure the game is not running while changing your skin. Go to MinecraftSkins.com and simply select from the millions of skins shared and uploaded by our community.
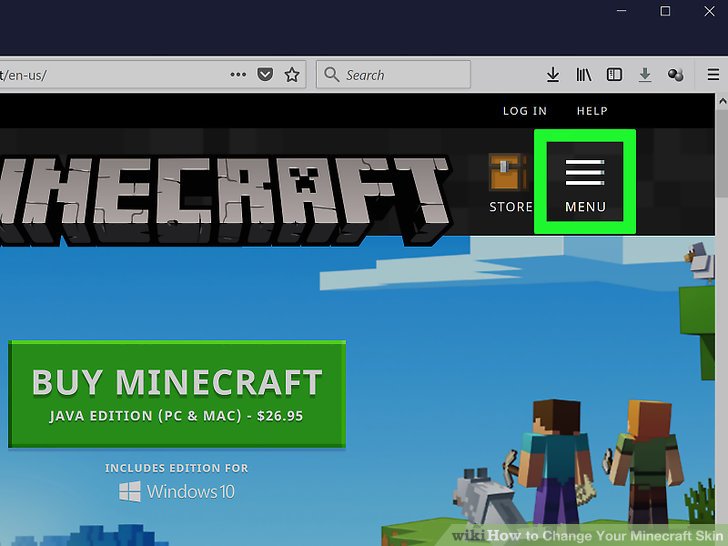
2. After deciding on a skin, enter the skin page of your choice, you will find the Upload to Minecraft.net button on the right side of the page. Click on it.
3. A new page will open up to Minecraft.net. Proceed to log in to your account and you will see your chosen skin already loaded onto the Upload Custom Skin box. Click on the Upload button.
4. And you are done! Load up the game and you should be wearing your new skin!
Don’t Miss: How Long Is One Day In Minecraft
Changing Skins In Minecraft Pocket Edition
Despite not offering the full Minecraft experience, Minecraft PE owners can get in on the custom skin fun as well.
On your mobile device, head to a third-party Minecraft skin website like Minecraft Skins then click Download on the page of the skin youd like to apply to your character. In the latest versions of iOS and Android, the should begin automatically. Once you have downloaded your character, open Minecraft PE and tap the coat hanger icon in the lower-right of the display.
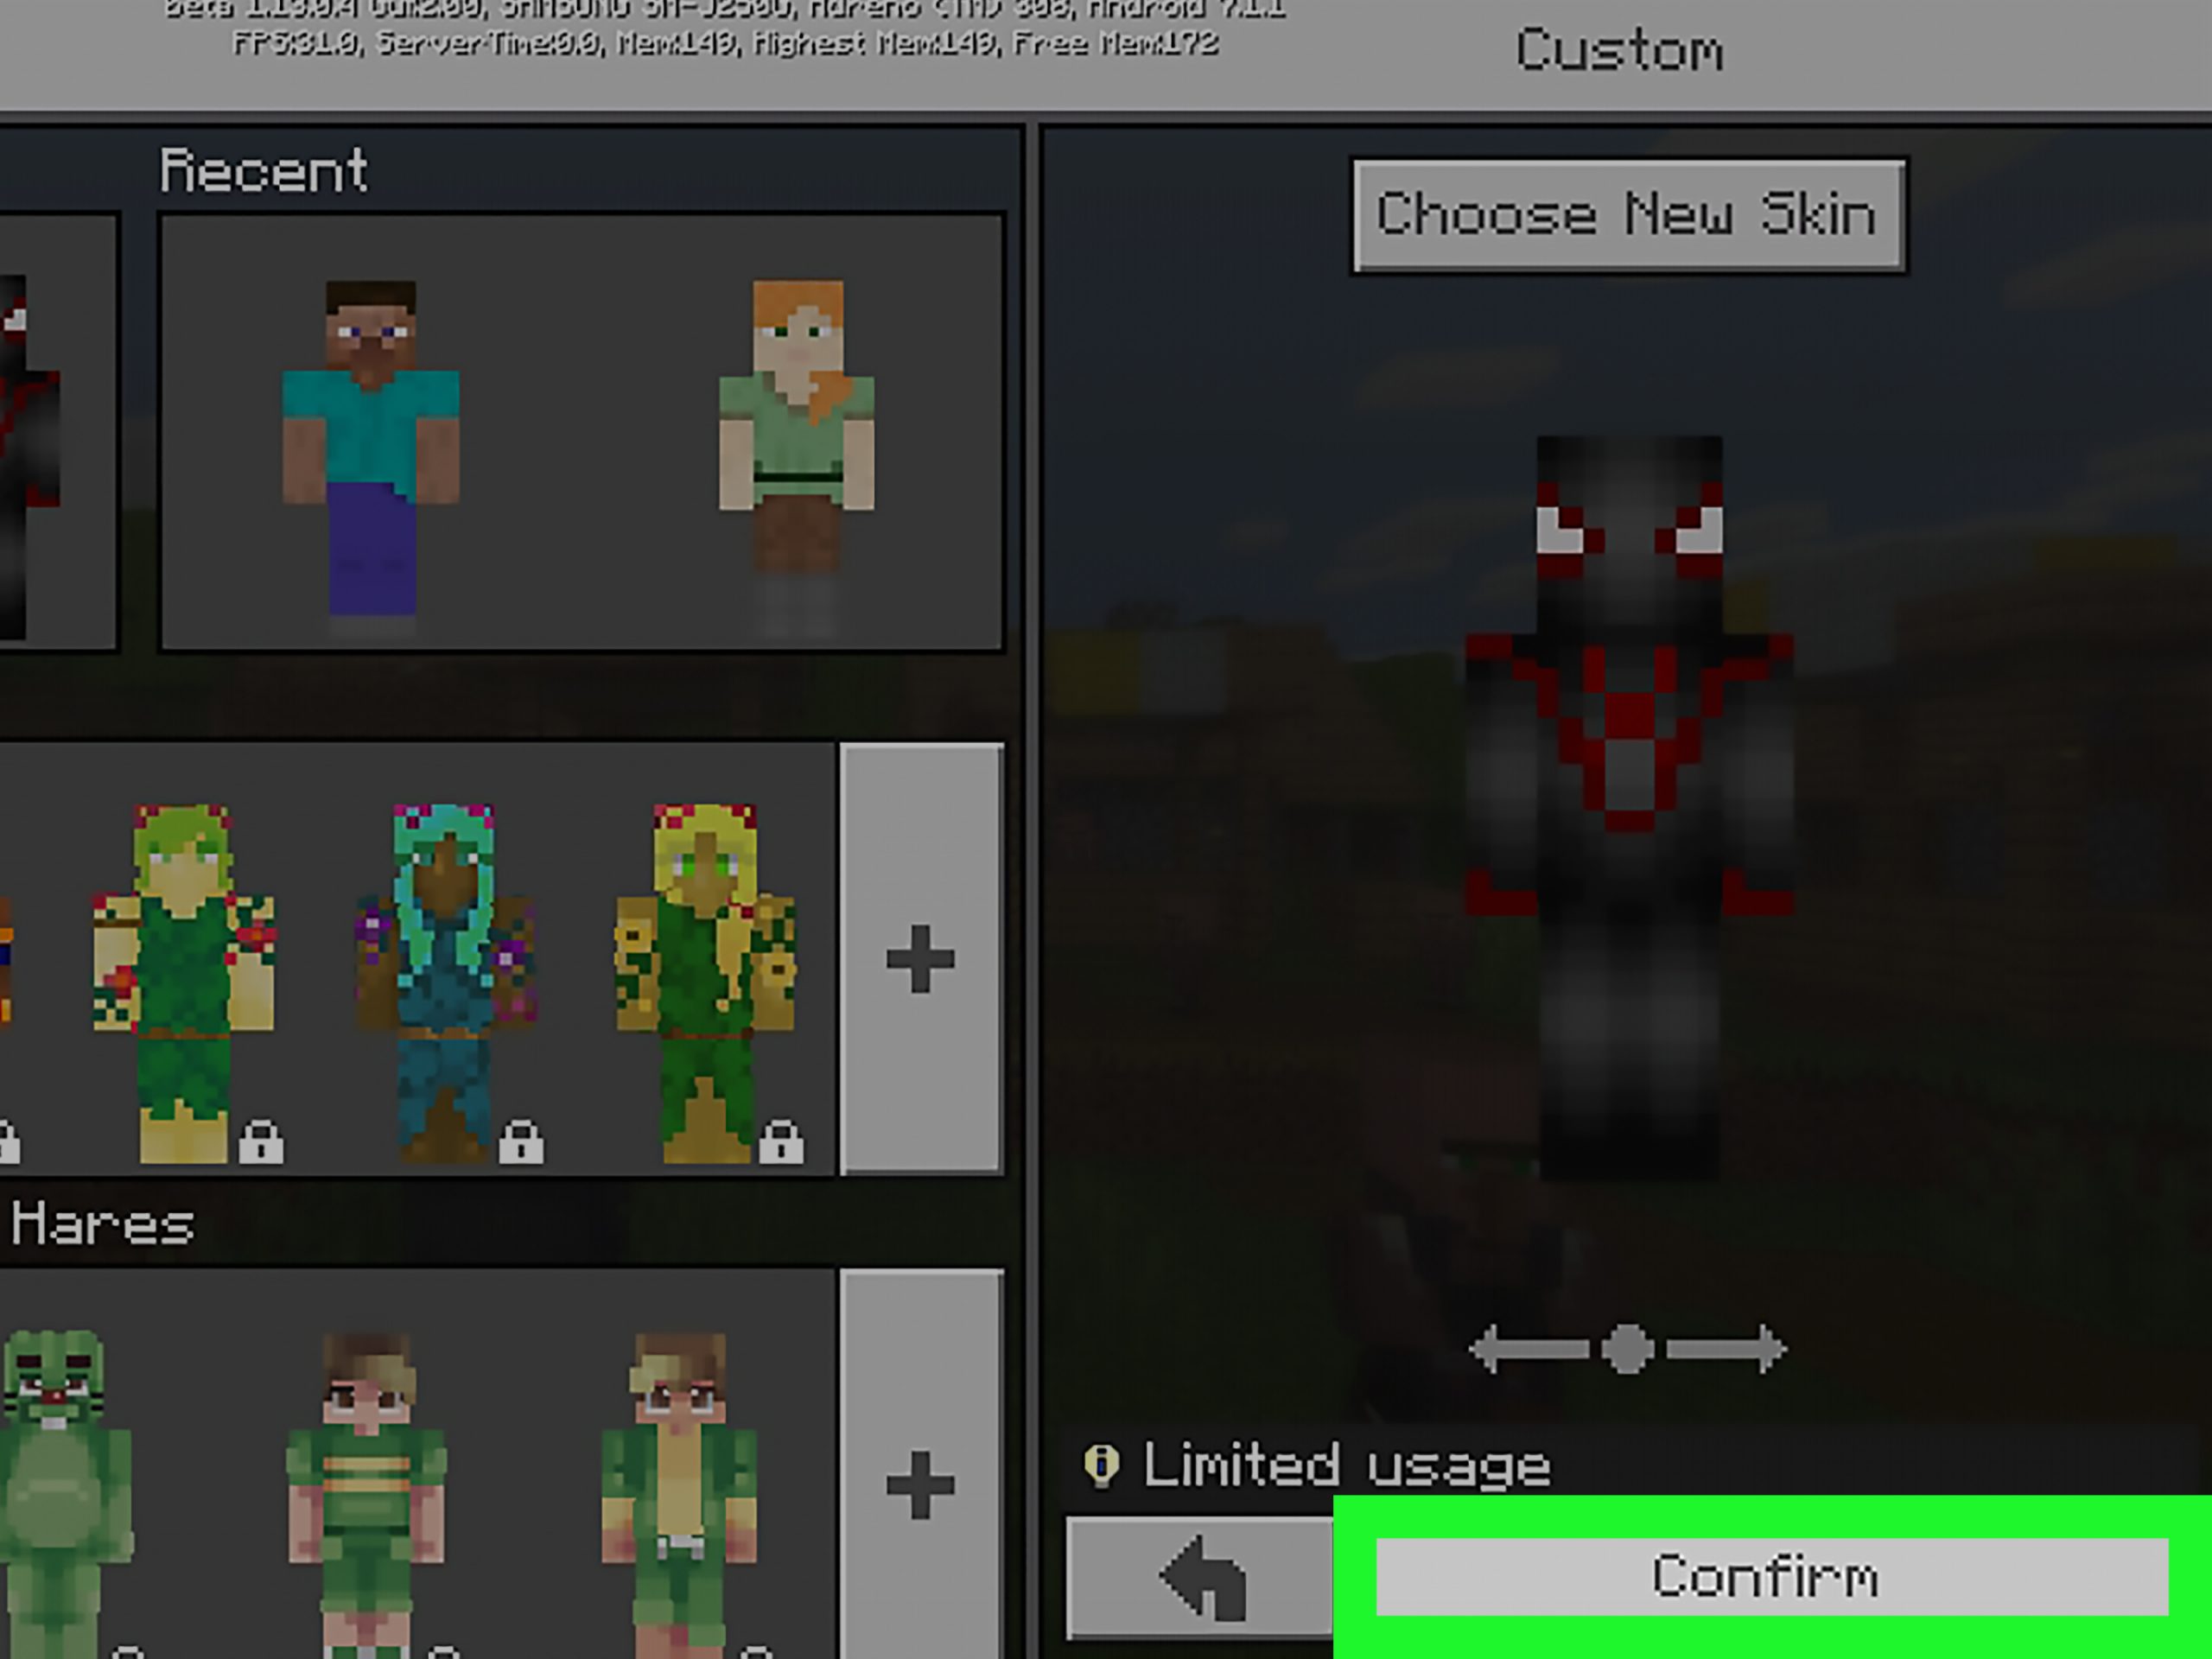
Tap the blank skin icon in the top-left of the display. Tap Choose New Skin and select the file you downloaded earlier. Select the appropriate skin model and tap Confirm to apply your changes. Once you have confirmed your selection, you should be able to see your new skin in Minecraft PE.
How Do You Change Your Minecraft Skin On Nintendo Switch
by11.9k Views326 Votes
Change Minecraft skin on Console
When you open up the game, navigate to the Help and Options section, and click the change skin option. There should be a variety of skin packs you can purchase, and after you buy or choose the one you want, you can pick the choice you want for your avatar.
De plus, How do you change your skin in minecraft 2021?
Change Skin
Ainsi Can you mod Minecraft Nintendo switch? Unfortunately, you cannot add mods to Minecraft on Nintendo Switch. However, you can add as many add-ons as you want.
Sommaire
Read Also: How To Put A Book On A Lectern In Minecraft
Finding A Minecraft Skin
The first step to changing your Minecraft skin would be to find one you like. Simply searching Minecraft skin will pull up hundreds of great options. Once you find one you like, download it to your computer. The image will look like this:
Its normal for your downloaded skin to look like that! Its actually supposed to. Your skin will look normal once its uploaded to your account.
Next, youll have to go to Minecraft.net and log on to your account!
Once youre logged in, click on your email address which will be at the top corner of the screen, and click Profile from the drop-down menu. Once you are at your profile, click on the Skin tab.
How To Change Your Skin On Minecraft: Bedrock Editionprint
In Minecraft: Bedrock Edition, skins are stored locally on your device. This guide assumes that you have saved your skin locally on your device.
1. Open Minecraft: Bedrock Edition on your device.2. Tap the settings icon.3. On the next screen tap the second button left hand menu.4.Tap on the “Browse” next to the Steve skin. In our example, we have a few skins that we’ve already loaded.5. You will be presented with the browse option for you phone. Browse to where you downloaded your skin and tap on it.6. You then are to choose the correct model type for you skin. Choose whichever looks best to you.
Congratulations! You’ve changed your skin in Minecraft: Bedrock Edition!
Was this answer helpful?
Read Also: How To Make A Cobblestone Generator In Minecraft
Using Your Minecraft Account On Windows
The process of uploading your skins to your Minecraft account also works on Windows. The steps are as follows:
Of the two methods, the browser method is more convenient. You dont need to have Minecraft: Java Edition installed. All you need is a computer with Internet access.
Uploading A New Minecraft Skin In Java Edition
If you want to upload a brand-new skin, click on the large plus icon on the right of your current skin that says “new skin” underneath. You’ll see the following window:
This is the new skin window, which allows you to do a number of things. First, give your new skin a custom name to make it easier to recognize.
- Note: Some skins are made with the slim player model, so depending on what type of skin you want to use, select either Classic or Slim.
Once you’re done, it’s time to upload the actual skin file. Click Browse to open up the file explorer on your PC and locate your skin file.
Skin files can be from sites like MinecraftSkins and NameMC. They will typically be downloaded as PNG files, as shown in the picture above.
When downloading make sure to save the PNG file into a folder that’s easy for you to find, since you’ll need to locate it while browsing for a skin file.
RELATED: Minecraft: 10 Best Texture Packs For Java Edition
After you’ve selected and confirmed the skin file, it should appear as a preview on the left side of the new skin window.
Now you can navigate back to your library and select your new skin, which will automatically be updated on your character model the next time you log into the game.
Recommended Reading: What Gives You The Most Xp In Minecraft
Heres How To Change Skins In Minecraft
Minecraft players who do not want to just be another Steve will be much more inclined to change up their appearance in their Minecraft worlds. This is especially true if you are in a multiplayer world or in one of your buddys servers and want to show off the latest and greatest skins in Minecraft. Not sure where to start when it comes to changing your skin in the block-filled world of Minecraft? Weve got you covered.
Learn About Standard And Slim Skin Models

If you havent uploaded a custom skin, you’ll have either the classic “Steve” skin or the newer “Alex” skin, which features slimmer arms. Your default skin is randomly based on your account ID and cannot be changed, although you can apply custom skins. This skin is also used when you don’t have a connection to the skin servers.You can create your own skin based on either model using the reference templates below:
Slim-armed skins are only fully supported in version 1.8 and higher if you have a slim-armed skin selected in a version prior, you will see black pixels on the arms.
To find your version number or instructions on how to update your version, see .
You May Like: How Do You Make Quartz In Minecraft
Changing Minecraft Skins In Console Editions
Many players think that it is impossible to get customs skins in console editions. What can we say? Unfortunately, it is true. Moreover, players are required to fork out to get some skins. But it doesnt mean that everybody is reluctant to change their skins because of that. To change skins in console editions, you should stick to the following instructions:
Fire up Minecraft and select the game from the consoles library.
- Dont forget to insert a disk if you purchased the game on the disk.
On the home page, click Help and Options.
Now you are ready to change your old boring skin. Just choose the Change Skin option. You will find it at the top of the window. Then, wait for the Skin Packs window to pop up.
As you might have guessed, it is high time to choose a skin pack. You may want to scroll to the top or the bottom of the page to be able to view all the available skins.
Then, select the skin of your choice.
- Dont be surprised if you see a padlock icon next to the desired skin. It means that you are required to get a premium pack to be able to utilize it.
If you are playing on Xbox, you are encouraged to hit A, while those who on PlayStation should press X to choose a skin for your player. If nothing goes wrong, you should see a green tick appear in the lower-right corner of the window.
- If the chosen skin is not free, you will be asked to buy it. If you are not planning on doing so, exit the window by hittingB or .
How To Download And Install Skins In Minecraft
The world of Minecraft is all about customization and standing out. But it isnt easy to come up with unique ideas in such a massive and happening community. Thats why the internet has a huge collection of Minecraft skins you can download and install to personalize your in-game experience. They are one of the most common and celebrated customization options in the game. Plus, you can find skins inspired by YouTubers, superheroes, and whatnot. We even have a list of the best Minecraft skins you can use if you want to take a quick pick. As for the process, it is simple to apply downloaded skins, and the option is available in every Minecraft edition, be it PE, Java, or Bedrock. You can even use most skins interchangeably across editions. But thats a discussion for later. For now, lets learn how to download and install Minecraft skins.
Read Also: How To Make Minecraft Account
How Can I Make My Own Minecraft Skin
You can make a Minecraft skin through any website that has a skin editor or creator. Alternatively, a program that can modify PNG files like Paint or Photoshop works well too. Both will yield a PNG file that you can upload to skin index websites or your game.
The websites we mentioned above make the process easier, as they already have the dimensions and format covered. Paint and Photoshop are for advanced users who have more experience.
Get Into Your New Skin In Minecraft
Now you know how to change your characters default skin in Minecraft. There are nearly limitless options for custom skins . You can choose from the official skins in the packs, use a custom skin, or create your own with some basic color tinkering.
What is your favorite Minecraft skin? Let us know in the comment section below.
Don’t Miss: What Does A Grindstone Do In Minecraft
How To Change Your Characters Skin Using Minecraft Launcher
If your Minecraft Java edition is running offline, the website-based process might not work for you. Thankfully, you can also download and install skins using the default Minecraft launcher.
1. Make sure you have a skin downloaded using the first section of the tutorial. Then, open the Minecraft Launcher by double-clicking on its icon on your desktop or game directory. You can also search for it after pressing the Windows key.
2. Once the launcher opens, dont click the play button as usual. Instead, move to the Skins tab at the top of the launcher. Then, select the New skinoption by clicking the + sign.
3. Now, the launcher will ask you to load your custom skin. Here, click on the Browsebutton to select your download PNG skin file. You can use the player model as classic or slim. Once your skin is selected, you can click the Save & Use button to apply it immediately.
No More Default Skins
There are thousands of skins available for free, and you can always make some with the help of websites. The skins work with Minecraft: Java Edition perfectly, so you dont have to worry about changing the games files. Of course, you can also change your skin through your Mojang profile.
What skin do you use in Minecraft? Have you tried making your own skin? Tell us in the comments section below.
Read Also: Minecraft For Free Play
How To Change Minecraft Skin
The methods to change the skin varies on Minecraft Java and Bedrock edition. But, for your ease, we have covered the easiest ways to use skins on all supported platforms. You can use them to easily switch between thousands of free and paid Minecraft skins. We have divided this guide into separate sections, explaining how to change your Minecraft skin on desktop, mobile, and consoles. So lets dive in.
Changing Your Skin For Lunar Client Through Updating Your Account

Since Lunar Client is tied to your official Minecraft account, it also follows that updating your skin through the Minecraft website also works. Lunar Client works on Windows, Mac, and Linux, so the methods all work across all operating systems.
Follow these steps to change your Lunar Client skin via Minecraft account update:
Recommended Reading: How To Feed Villagers In Minecraft