Why Do You Need A Minecraft Shield
Before we dig into the process to make a Minecraft shield, let me paint a picture of its importance for you.
Minecraft is full of battles, and you cant run away from it. At least in the game! And the most common mob you will face is the skeletonthe most annoying one to deal with. They use knockback from arrows to tug you into lava or down the cliffs.
It gets wrecking to fight with this type of mob, especially if you seek resources from dangerous and scavenger places. In this scenario, having a shield that is too made with cheap ingredients will help you survive.;
How To Make A Banner In Minecraft
If you don’t already have a custom banner, then you’ll need to make one before you can customize your shield. This is a pretty easy process that requires a stick and six wool to make the banner, and then a loom, a banner, and some dye to customize the banner.
These instructions are valid for every version of Minecraft, but you can only use your banner to customize your shield in the Java Edition of Minecraft.
Here’s how to make your custom banner in Minecraft:
Open your crafting table menu.
Place six wool and one stick in this pattern.
All the wool used must be the same color.
Move the banner from the upper right box into your inventory.
Open your loom.
In the loom interface, place your banner, your dye, and then select a pattern from the list.
The third box is for an optional ‘banner pattern’ item. These can be crafted with paper and an item. For example, a Wither Skeleton Skull + Paper will craft into a Skull pattern. If this is used, it will add a skull and crossbones to the banner.
Verify that you want that pattern, and move the custom banner into your inventory.
If you want, you can dye the custom banner again using this same method to create more complex patterns.
Add Items To Make A Shield
In the crafting menu, you should see a crafting area that is made up of a 3×3 crafting grid. To make a shield, place and 6 wood planks in the 3×3 crafting grid.
When crafting with wood planks, you can use any kind of wood planks, such as , , , , , , , or planks. In our example, we are using oak wood planks.
When making a shield, it is important that the iron ingot and wood planks are placed in the exact pattern as the image below. In the first row, there should be 1 wood plank in the first box, 1 iron ingot in the second box and 1 wood plank in the third box. In the second row, there should be 3 wood planks. In the third row, there should be 1 wood plank in the second box. This is the Minecraft crafting recipe for a shield.
Now that you have filled the crafting area with the correct pattern, the shield will appear in the box to the right.
Read Also: What Does Outdated Server Mean On Minecraft
Minecraft: Crafting And Using A Shield On Minecraft’s Mobile Version
In order to craft a shield, Minecraft players will need six wooden planks of any type and one iron ingot. These are easily obtained by cutting down trees and crafting the planks, then mining some iron ore underground. Once players have the needed materials, they can craft a shield by following the recipe below.
Once crafted, all players need to do is place the shield in their character’s hotbar or off-hand slot. The off-hand slot itself should have a small shield shape drawn inside of it, essentially begging for the shield to be placed within. Once players have placed their shield in their off-hand slot, all they need to do is tap a particular part of the screen.
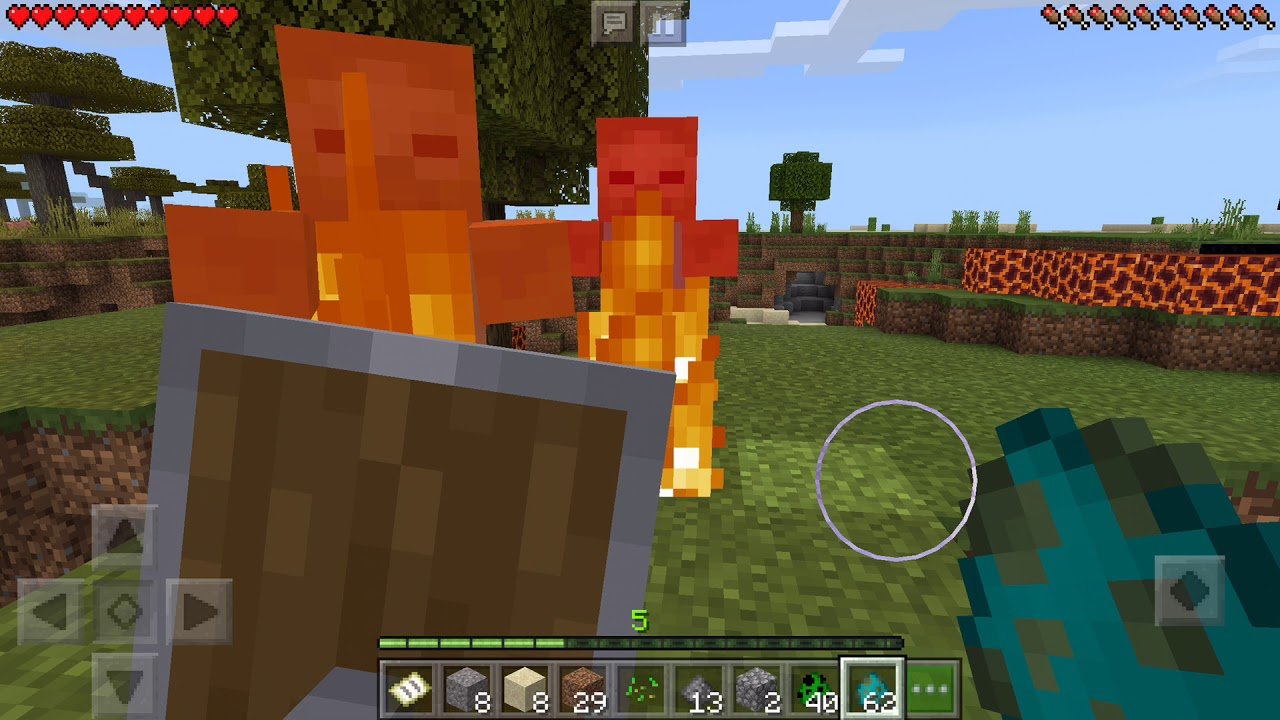
Between the movement buttons is a small button with a diamond pattern etched into it. This button is typically used to toggle sneaking. When double tapped with a shield equipped, a Minecraft player’s character will raise their shield in defense. Tapping the button again in the same manner will lower the shield. While the shield is raised, players will be protected from many of Minecraft’s frontal hazards. This includes arrows fired by hostile mobs, head-on melee attacks, explosions from Creepers or TNT, even flames and explosions fired from Blazes and Ghasts within the Nether.
Equip And Use The Shield

Step 1: Open your inventory.
Step 2: Drag the shield from your inventory into the square located at the bottom right of your avatar, as shown above. This square has a shield symbol inside.
The shield is now located in your off hand. In the Java Edition version, you can right-click to use the shield and block attacks. In all other versions, the shield goes up when you enter Sneak Mode . You can place a shield in the Hotbar and use it as a weapon in your main hand too.
Check out our other guides for Minecraft:
Also Check: Can You Play Cross Platform Minecraft
Move The Shield To Your Inventory
After the shield has been crafted, you’ll need to drag it down to your inventory so you can use it.
That’s it! You now have a shield. A Minecraft shield is a tool that protects players from some attacks. Shields can also be decorated with banners and enchanted with unbreaking, mending, and curse of vanishing enchantments.
How To Use Minecraft Banners
You can use banners in Minecraft to create customised shields. Minecraft banners are crafted from wool, and the colour of the wool will influence the design of your banner. The banner can be placed onto the shield in the crafting grid, side by side in the 3×3 grid, with the shield directly in the middle and the banner to the left.
In theMinecraft combat rework snapshot 8c, attaching a banner to your shield will also upgrade it by adding ten absorption instead of five, and increased knockback resistance.
Read Also: What To Do With Dragon Egg Minecraft
What It Can Do
Everyone knows what a shield is meant for: to block damage. However, the kind of damage it can block varies. It has the ability to nullify most of the basic attacks in the game, including all arrows, melee attacks, thorns, tridents, fireballs, bullets, lasers, as well as the blast damage of any explosions.
Given that it can block out so much and completely remove damage from the majority of attacks, it’s one of the most valuable items to have in the game, especially when fighting mobs in the Nether or in the End.
Add The Iron Ingot And Planks To The Menu
In the crafting table, add the iron ingot and the 6 planks to the grid. You can use any type of plank including oak, dark oak, spruce, birch, jungle, and acacia planks. You can even mix and match. In our example below, we use oak wood planks.
You must add the items to the grid exactly as shown in the image below. In the 1st row place down 1 wood plank in the 1st box, 1 iron ingot in the 2nd box and 1 wood plank in the 3rd box. In the 2nd row place down 3 wood planks, one in each box. In the 3rd row place down 1 wood plank in the 2nd box. This is the Minecraft shield recipe.
Now that you’ve added each item to the grid as described above, you’ll notice a shield appear in the box on the right.
Recommended Reading: How To Copy A Map In Minecraft
Should You Make Shields
100% yes! For such cheap crafting prices, shields give you so much defensive ability. They’re too good to skip in this game. You will find an awful lot of uses for this tool.
In fact, shields can’t beat mobs but many mobs in the game are challenging to defeat without a shield to protect you.;On top of that, you can enchant shields in Minecraft to further their power.
How To Craft Minecraft Banners
Crafting a banner in Minecraft is easy, although there are countless designs to choose from, which makes it a little bit tricky. First, youll want plenty of wool and one stick. Go into your crafting table screen and arrange the pieces with the stick in the bottom middle slot, and the top six slots all occupied by wool.
Fancy Pants:;Our guide to the best Minecraft skins
To choose a design you need to craft a loom, interact with it, place the banner in the top left slot, and any dye materials in the top right slot, which should bring up a menu of possible designs. Alternatively you can use the crafting table and arrange dyes around your banner until you find the pattern thats right for you.
Read Also: How To Join Friends Minecraft Server
How To Apply A Pattern To A Minecraft Shield
You can make your Shield custom by applying banner patterns to it in Java Edition. It allows you to simply change the color of the shield, or add a design to the front. Applying a banner allows it to match your armor, or be more intense such as matching it to a clan banner.;
You can create a colored banner using a single stick with 6 pieces of Colored Wool on top inside a Crafting Table. Take the banner into a Loom to start designing a pattern. Once youre done with the design, place the Banner and Shield in a crafting table together.;
How Do You Put A Banner On A Shield In Minecraft

To put a banner on a shield in Minecraft, place 1 shield and 1 banner in the crafting grid. In the 2nd row place down 1 banner in the 1st box and 1 shield in the 2nd box. Your custom shield will appear in the box to the right.
Check out our tutorial on how to make a banner in Minecraft to craft the banner you will need to put on your shield.
Don’t Miss: What Are Cauldrons Used For In Minecraft
How To Use Shields In Minecraft On Mobile
When it comes to surviving Minecraft, a shield can be an invaluable asset, as it blocks many hazards such as melee attacks, projectiles, and even Creeper explosions.
Shield durability isn’t infinite and they will need repairs or recrafting with regularity, but they are still a solid investment for Minecraft players that spend a lot of time in combat. When going into dangerous areas like the Nether or The End, a shield can be the difference between victory or death.
Crafting one doesn’t take many materials, and the same goes for repairing a damaged one as well. Given their ease of access, it’s good practice to at least keep a shield in one’s inventory in case it’s needed.
How To Locate Iron Ore And Make Iron Bars
Iron ore is the most common type of ore in Minecraft, so you’ll find it all over the place. Look underground from just above sea level all the way down to bedrock. If you can find a natural cave system or a deep ravine, you’ll often see exposed veins of iron ore ready to mine. You can also find iron bars in chests if you happen across a village, stronghold, mine shaft, tower, or sunken ship.
Here’s how to get iron ore and make an iron bar for your shield:
Locate and mine some iron ore.
Open your furnace.
Place iron ore and a fuel source like coal, charcoal, or wood into your furnace.
Wait for the iron ingot to smelt.
Drag the iron ingot into your inventory.
Don’t Miss: What Is A Scaffolding In Minecraft
How To Customise A Shield In Minecraft
The short version is you combine a banner with a shield to transfer over the pattern. Easy. But how much do you know about building and customising a Banner?;If the answer is ‘A lot’, you can probably skip the longer version of this section. If not, keep reading.;
To craft a Banner, you need six pieces of Wool and a Wooden Stick. The banners colour will match the wool used, so ensure to dye the wool if you want a colour more interesting than white, brown or black. Now comes the fun part: Customisation.;
Customising a banner requires a Loom, which you can craft by combining two String and two Wooden Planks. Then, all you need to do is put your shield and some dyes into the Loom, letting you change the patterns on it. You can do this multiple times with multiple different colours to create something truly unique to you.;
Once youve customised your banner, you just need to combine it with your shield and youll have a fancy new bit of equipment to walk around with. You do this by placing them both in the Crafting Table, then removing the customised shield.;
How To Add A Pillager Banner Shield In Minecraft
Villager vs pillager addon replicas shields decorated with ominous banners banner official minecraft wiki shield minecraft wiki fandom shield official minecraft wiki
How to make a banner in minecraft materials crafting uses faqs how to trigger a pillager raid on minecraft pe 6 s wearable cape banners addon minecraft pe mods addons how to make a banner in minecraft crafting copying and using banners pro s minecraft banners create and customise shields pcsn
Also Check: How To Enter Commands In Minecraft
Why Make A Shield
If you’re still not fully sold on the idea of a shield, let’s paint a picture for you. One of the most common mobs in the game is a skeleton, which also happens to be one of the most annoying ones to deal with. They often use range to get to you, and can use the knockback from their arrows to push you down cliffs or into lava pits.
This can really wreck a game at higher difficulties, especially when exploring dangerous caves and scavenging for resources. Given that a shield is so easy to make and relatively cheap in crafting ingredients, there’s really no excuse not to make one to help you survive longer.
How To Use Minecraft Shields
Your newly crafted Minecraft shield is used for defending against enemies and other players. The best home for your shield is in the off-hand slot, and once equipped can be quickly accessed using the right-click function in the Java Edition or crouch in the Bedrock Edition to block incoming attacks, however your movement speed will be significantly reduced as you crouch.
The shields weakness is an axe attack the blow will cause the shield to deactivate for five seconds, leaving you exposed to incoming attacks. You can block the following attacks using your shield in Minecraft:
- Melee attacks
- TNT
- Non-magical projectiles
- Guardian/elder guardian lasers
Using your newly crafted Minecraft shield, youre able to fend off melee attacks from hostile Minecraft mobs, prevent ranged damage, and recover quickly by using enchantments or repairing your shield. But did you know you can also decorate it?
You May Like: How To Xray In Minecraft Bedrock
How To Make A Shield In Minecraft
In order to make a Shield in Minecraft, youll first need to open up a crafting table. Youll need to fill up 7 slots, so the crafting inventory in your interface wont work.
Place an Iron Ingot in the top middle slot, then surround it in any type of Wooden Planks. Add an extra plank into the bottom middle slot, so youve made a Y shape. Congratulations, youve now made a Shield in Minecraft!
How To Obtain The Components To Make A Shield

To make your shield, you need wood planks and iron ore. The wood planks can be made from any type of wood, which you obtain by punching or chopping trees, while iron ore can be found anywhere from the bedrock to a little bit above sea level.
How to get wood planks:
Punch or chop trees until you have some wood logs.
You only need two logs to make enough planks to make a shield.
Open your crafting menu or crafting table, and place your logs in the center.
Move planks from the upper right box into your inventory.
Planks are created in stacks of four, so you will quickly generate a lot of planks.
Read Also: What Is The Random Tick Speed In Minecraft
Shields In Minecraft Give You The Ability To Block Incoming Attacks Arrows And Projectiles They’re Simply Too Good To Miss Out On
Before shields arrive in Minecraft, the game’s combat system was fairly straightforward. You dashed into the battle with a sword in hand, then spammed your attack button repeatedly. It was pretty one-dimensional. But Mojang updated combating, adding new mechanics, and shields in Minecraft. By default, shields in the game resemble tower shields, with the ability to block incoming attacks.
But do they worth crafting? Here’s what you need to know about shields in Minecraft!
How To Use Shields In Minecraft
Players can equip a shield as a second-hand item to wield in Minecraft. You will find the slot for it to the left of the crafting area. Putting a shield here will place it on your character’s left hand. This way, you can use tools and weapons while holding a shield.
Hold the Interaction button to raise the shield. You CANNOT attack while raising a shield. So, use it to block incoming attacks, then quickly respawn with one of your own. You can also use shields to close up on long-ranged mobs, like skeletons or pillagers by blocking their arrows.
You will take less damage if you raise a shield before the creepers blow up. You will still take damage, but it has been reduced.
Recommended Reading: How To Make A Brewer In Minecraft